Can i please have your HUD?MX PRODIGY 17 wrote:
Still wayyy too much work left :/
Shifter, Pitboard, Tach are so sexy
Can i please have your HUD?MX PRODIGY 17 wrote:
Still wayyy too much work left :/
barrington314 wrote:awood is right
Leclair wrote:My name is barking
2014 rF GNC 22nd Overall - 2014 rF 450 SX 12th - 2014 rF 450 MX 11th OverallLeclair wrote:i fuck you
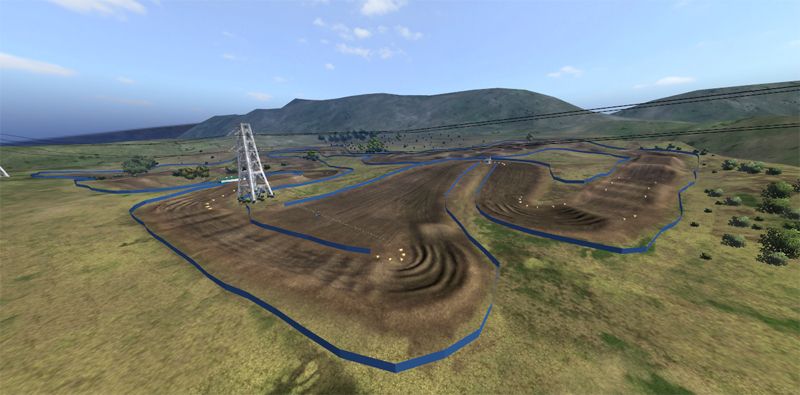
Warrior's original base rescaled and much of it was re-built. Gio hooking it up with rough/ruts/visuals. I'm sure I'll give it finishing touches too at some point.Jones221 wrote:Just kind of repeating, it's checks track. He just did visuals if I'm not mistaken.
If it doesn't come out good then I guess they wont use it. I have improved quite alot since my last creation. I race MX338 pretty much every week. Worth a shot.Jones221 wrote:No offense, but I don't think your version would be better.

I will make two versions if I do the track.760Liam wrote:When someone does make Southwick, can they make it really muddy and stormy? Because last year it was pretty roughed up..
"#benice"Jones221 wrote:I took it easy, that was just mean. #motosportkids..
jlv wrote:Team Motosport Honda's Brina made MX Simulator history as she became the first woman to take a win in a major series.
track will need checkerz' magic touch at the endcheckerz wrote:Warrior's original base rescaled and much of it was re-built. Gio hooking it up with rough/ruts/visuals. I'm sure I'll give it finishing touches too at some point.Jones221 wrote:Just kind of repeating, it's checks track. He just did visuals if I'm not mistaken.


You weren't there on MSN, so here's a quick tute on the way I do it:giopanda wrote:Oh god am i the only one who's not able to place banners in blender?
I'm having such a hard time trying to figure out what's wrong..and i guess haggqvist is getting tired of my continuous questions..
How did you managed to place them dj?
Could you hit me up on msn please?
