Screenshot Tutorials/tips
-
Mikey
- Posts: 7018
- Joined: Sat Nov 08, 2008 1:27 am
- Location: Melbourne
- Contact:
Screenshot Tutorials/tips
Hey guys, im shitful at screenshot editing, so i was wondering if you guys could post what you about it. Just any tips and help would help alot!
My photography work
www.mikeowenphotographer.com
www.mikeowenphotographer.com
-
DJ99X
- Posts: 15524
- Joined: Tue Jan 15, 2008 11:36 am
- Location: Land Down Under
Re: Screenshot Tutorials/tips
Take Screenshot
Crop
Resize
Save
Upload
Crop
Resize
Save
Upload
-
stocksy129
- Posts: 1582
- Joined: Thu Nov 06, 2008 8:21 am
- Location: Australia, VIC
Re: Screenshot Tutorials/tips
well, mine aren't the best... But i guess i can help.
first i use "smart sharpen" then make a new layer, use gradient tool black-white draw from top-bottom then change the layer to overlay or something similar what ever looks best, then if areas are too dark.. I use the brush tool with white or black to edit it brighter or darker on the gradient layer. After that i use "the fill or adjustment layer-hue/saturation" then edit the colors then.. I blur back ground to what ever, use radial blur on what ever you think needs it, also i edit the levels and brightnes and contrast, i also use the "dodge" tool on the metals to make them brighter(shineyer) and some times the burn tool to make the weld shading darker. And finally i put a photo filter over it, some times, depends if it looks good or not...
Hope this helps a little... Just wrote it quickly
-
Zane_Mx#88
- Posts: 467
- Joined: Thu Jul 01, 2010 10:41 pm
Re: Screenshot Tutorials/tips
What do you resize the image to?DJ wrote:Take Screenshot
Crop
Resize
Save
Upload
-
Mbutler183
- Crushed Dissenter
- Posts: 1929
- Joined: Tue Feb 17, 2009 9:57 pm
- Team: Creme Egg
Re: Screenshot Tutorials/tips
Everyone has there own way of doing it, and each shot requires different editing.
All im going to say is: BLUR IS YOUR FRIEND
Combine it with a few photo effects and you can have a sick screenshot.
All im going to say is: BLUR IS YOUR FRIEND
Combine it with a few photo effects and you can have a sick screenshot.
-
yzmxer608
- Posts: 15352
- Joined: Mon Dec 29, 2008 4:30 am
- Team: SYS
- Location: Wisconsin, U.S.A
Re: Screenshot Tutorials/tips
Don't go overboard with effects, that's something I still have a problem with...
TeamHavocRacing wrote:If I had a nickel for every time someone asked for this, I would have a whole shitload of nickels.
-
Mikey
- Posts: 7018
- Joined: Sat Nov 08, 2008 1:27 am
- Location: Melbourne
- Contact:
Re: Screenshot Tutorials/tips
yeah, i gotta try using blur i haven't really tried editing photos but i guess i gotta get a good medium. and a better PC for quality lol
My photography work
www.mikeowenphotographer.com
www.mikeowenphotographer.com
-
Mr.Two
- Posts: 1060
- Joined: Mon Sep 21, 2009 9:25 pm
Re: Screenshot Tutorials/tips
For my basic shots:
Duplicate Original image twice
image<mode<grayscale on the top image
set grayscale image to %25 opacity
The unaltered image I usually increase the contract 25-30pts and darken the brightness to my liking
Create a layer at the top/fill with any color/filter<noise<add noise(monochromatic)
blur<gaussian blur 1-5%strength< set opacity to 2-3%
resize< save< upload< post

-
Pumaxcs
- Posts: 13228
- Joined: Sat Dec 15, 2007 11:50 pm
- Team: Kyle/Luiz
- Location: Western, Kentucky
Re: Screenshot Tutorials/tips
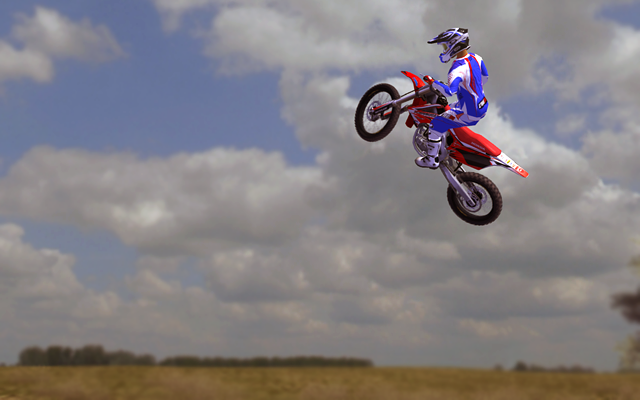
Pumaxcs wrote:With the sudden burst of screenshots lately, none of them have been really enjoyable to look at. Won't say names or point elbows but who know who you are. Also this doesn't matter if your computer can't take good, clear pictures. It's about helping you make them look better than what I've seen the last 5 pages. Here I am to help.
http://img801.imageshack.us/img801/940/ ... ot006x.png
The link below is the original. All I'm trying to show is that you don't need alot of effects to cover up things or to make it look good. I did a very minimal change in PS and came out with this. Yes, it does take practice to learn how to use those effects, but it really isn't that hard. Just take on shot and play with it over and over again. While I'm talking about effects let me say this. NEVER use filters, unless you know what your doing with them and have a plan. Even I can't use them and make them look good in this game, stay away from them. Only use effects such as, color balance, contrast/brightness, levels, etc.
Link, to a Desktop size. I am currrently using this cause I'm really proud of how this came out.
http://img822.imageshack.us/img822/1451/mxd13.png
http://img714.imageshack.us/img714/9810 ... t005on.png
This shot is to show you that if something is a little wrong to you, others will think so too. I took this shot hoping to get the rider to look right( changing color/contrast to make him not look as blocky. NOT sharpen. ) It didn't work out but I really like the angle so, I used the clone stamp tool and removed the rider from the image. What I have now is a very creative looking image created by pure accident.
http://img822.imageshack.us/img822/7755 ... ot001y.png
This one is to remind you of the "Rule of Thumbs". Do not have your rider in the center of the picture but still have him as the focus. Also to use other things in your enviroment to get a better image. You may or may not have noticed the power plant that was in the skybox, not the focus but its another subject in the picture. Also to make the rider the focus use a blur on the other things in the enviroment to make him stand out more. Hardest thing with blur is to be realistic with it. Don't just use a heavy blur on everything around him. Things farther from him will be more out of focus and things closer will be a little less fuzzy.
Hope that I helped you in the slightest way and please use this information i have just given you. The pictures in the link below the edited image are not resized from my desktop so they might be big for some of you but all I really did that was for you to see the original and what I did to the image as a visual aid.
Any questions feel free to ask here.


-
Mikey
- Posts: 7018
- Joined: Sat Nov 08, 2008 1:27 am
- Location: Melbourne
- Contact:
Re: Screenshot Tutorials/tips
sweet guys ty heaps, imma try it all out! 
My photography work
www.mikeowenphotographer.com
www.mikeowenphotographer.com
-
Ryan638
- Posts: 97
- Joined: Thu Aug 06, 2009 9:09 am
Re: Screenshot Tutorials/tips
They're for mva, but there's still some useful stuff there
http://www.youtube.com/watch?v=LlIMDj0UB2k
http://www.youtube.com/watch?v=O0Sd5n21 ... re=related
http://www.youtube.com/watch?v=WRMalFu1 ... re=related
http://www.youtube.com/watch?v=f7zvAZl4 ... re=related
http://www.youtube.com/watch?v=osTjZdsv ... re=related
http://www.youtube.com/watch?v=LlIMDj0UB2k
http://www.youtube.com/watch?v=O0Sd5n21 ... re=related
http://www.youtube.com/watch?v=WRMalFu1 ... re=related
http://www.youtube.com/watch?v=f7zvAZl4 ... re=related
http://www.youtube.com/watch?v=osTjZdsv ... re=related
-
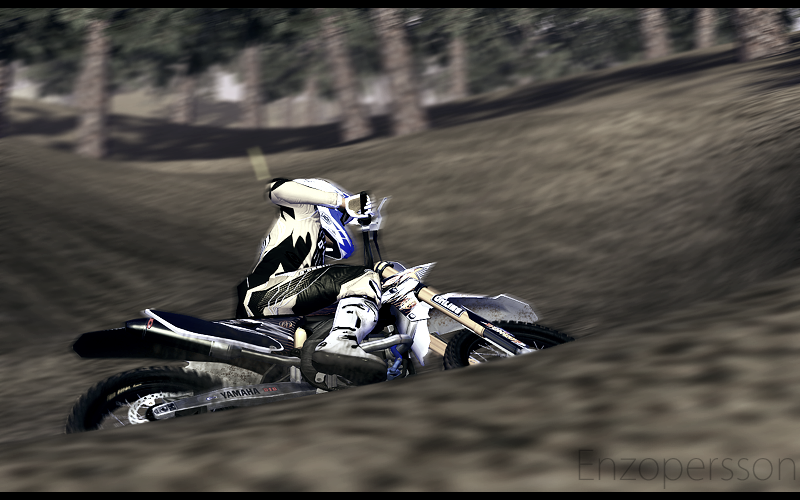
enzopersson
- Posts: 1598
- Joined: Thu Jan 31, 2008 8:38 pm
- Team: Privateer
Re: Screenshot Tutorials/tips
I usually go with this.
play with levels,
Hue/saturation
color balance
brightness/contrast
And another one i just forgot the name of.
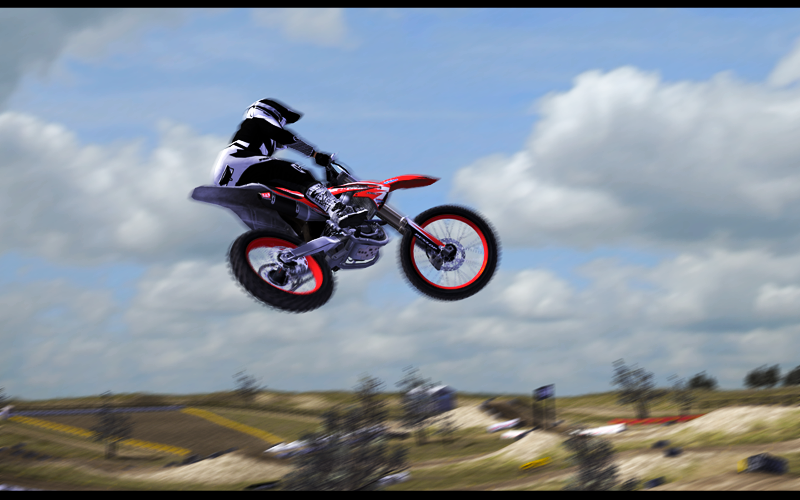
Then i go with the radial blurr on wheels, and then motion / movement blurr?
Background blurr
And resize to 800x500
play with levels,
Hue/saturation
color balance
brightness/contrast
And another one i just forgot the name of.
Then i go with the radial blurr on wheels, and then motion / movement blurr?
Background blurr
And resize to 800x500